

THE MANUAL LIBRARY
Kubota U17, U17-3 Excavator Repair Manual
$34.00
Documentation Specifications
| Manufacturer | Kubota |
| Applicable Model | U17, U17-3 |
| Machine Type | Excavator |
| Documentation | Repair Manual |
| Publication Reference | 97899-61970 |
| Language | English |
| Format |
Manuals Provided
| Kubota U17, U17-3 Excavator Repair Manual | 740 Pages |
For Kubota U17, U17-3 Excavator, this reference brings together the listed repair manual material. Start with I General and follow the relevant document section for the task.
What’s Covered Inside
Table of Content of the Workshop Service Manual
I General
II Machine body
Mechanism Section . . . . . . . . . . . . . . . . . . . . . . . . . . . . . .II-M-1
Service Section . . . . . . . . . . . . . . . . . . . . . . . . . . . . . . . . .II-S-1
III Engine
Mechanism Section . . . . . . . . . . . . . . . . . . . . . . . . . . . . . .III-M-1
Service Section . . . . . . . . . . . . . . . . . . . . . . . . . . . . . . . . .III-S-1
IV Hydraulic System
Mechanism Section . . . . . . . . . . . . . . . . . . . . . . . . . . . . . .IV-M-1
Service Section . . . . . . . . . . . . . . . . . . . . . . . . . . . . . . . . .IV-S-1
V. ELECTRICAL SYSTEM
Mechanism Section . . . . . . . . . . . . . . . . . . . . . . . . . . . . . . . . . . . . V-M-1
Service Section. . . . . . . . . . . . . . . . . . . . . . . . . . . . . . . . . . . . . . . . V-S-1
U17, U17-3
Your KUBOTA dealer is always ready to help so that your excavator offers the best performance. After having carefully read this manual, you will realize that much of the routine maintenance can be done by yourself. Machines must be disassembled and assembled efficiently and safely. It is very important to thoroughly understand the construction and function of the machine, to make all appropriate preparations, and start operations according to the specified working procedures in this workshop service manual.
IMPORTANT INSPECTION ITEMS AFTER REASSEMBLING
a Operate the Kubota U17, U17-3 Excavator and check for Unusual Noise and Vibrations.
b Make Sure the Safety decals and Wire harness Clamps are in their Specified Positions.
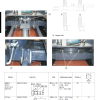
c With the Machine Front in a Specified Posture, Check the Amount of Hydrauric Oil Checking the oil level (For further details, refer to the Excavator U17, U17-3 Operators Manual)
1) Park the machine on a level ground.
2) Make sure the hydraulic oil temperature is in the range of 10-30C (50-86F) and see if the oil level is within the specified zone of the oil level gauge.
3) Keep the machine front as shown as following posture.
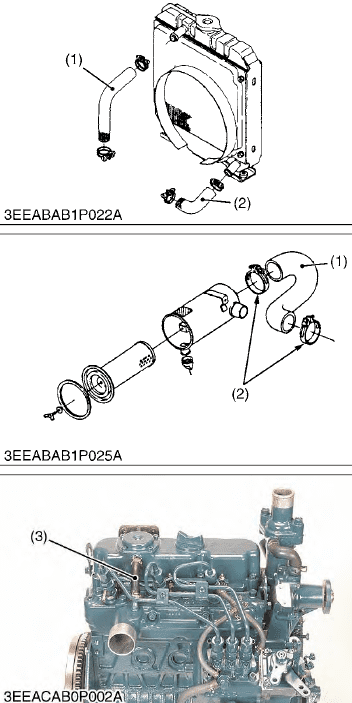
Checking Radiator Hoses and Clamp Bands
1. Check to see if the radiator hoses are properly fixed every 200 hours of operation or every six months, whichever comes first.
2. If the clamp is loose, apply oil to the threads and retighten it securely.
3. The water hose is made of rubber and tens to age. It must be replaced every two years. Also replace the clamp and tighten it securely.
W1029518
Checking Intake Air Line
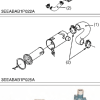
1. Check to see if the intake air hose(s) (1) and the breather hose (3) are properly fixed every 200 hours of operation.
2. If the clamp (2) is loose, apply oil to the threads and retighten it securely.
3. The intake air hose(s) (1) and the breather hose (3) are made of rubber and tends to age. It must be changed every two years.
Also change the clamp (2) and tighten it securely.
IMPORTANT To prevent serious damage to the engine, keep out any dust inside the intake air line.
Use publication 97899-61970 with the U17, U17-3 model details to select the appropriate documentation. Refer to I General within its stated document and equipment scope.
Reviews
There are no reviews yet.